Spring (4) - Serving Web Content with Spring MVC
https://spring.io/guides/gs/serving-web-content
[Spring Boot] Spring MVC로 웹 콘텐츠 제공하기 (Thymeleaf, DevTools)
스프링 부트(Spring Boot) 환경에서 웹 애플리케이션을 개발할 때 가장 기본적인 흐름은 클라이언트의 요청을 컨트롤러가 받아 처리하고, 이를 뷰(View) 템플릿을 통해 화면으로 보여주는 방식이다.
Spring Initializr 구성부터 컨트롤러 작성, Thymeleaf 연동, 그리고 DevTools 활용법까지 정리한다.
1. 프로젝트 초기 설정 (Spring Initializr)
start.spring.io에서 프로젝트를 생성할 때 다음 의존성(Dependencies)을 추가한다.
- Spring Web: RESTful 웹 서비스 및 Spring MVC 기반 애플리케이션 구축
- Thymeleaf: 서버 사이드 HTML 렌더링을 위한 템플릿 엔진
- Spring Boot DevTools: 개발 생산성을 높여주는 유용한 도구 모음
2. 웹 컨트롤러(Web Controller) 작성
사용자의 HTTP 요청을 받아 처리할 컨트롤러 클래스를 작성한다. @Controller 어노테이션을 부착하여 Spring MVC의 컨트롤러로 등록한다.
1
2
3
4
5
6
7
8
9
10
11
12
13
14
15
16
17
18
package com.example.servingwebcontent;

import org.springframework.stereotype.Controller;
import org.springframework.ui.Model;
import org.springframework.web.bind.annotation.GetMapping;
import org.springframework.web.bind.annotation.RequestParam;

@Controller
public class GreetingController {

    @GetMapping("/greeting")
    public String greeting(@RequestParam(name="name", required=false, defaultValue="World") String name, Model model) {
        model.addAttribute("name", name);
        return "greeting";
    }

}
코드 분석
@GetMapping("/greeting"):/greeting경로로 들어오는 HTTP GET 요청을 해당 메서드에 매핑한다.@RequestParam: 쿼리 파라미터(?name=value) 값을 가져온다. 값이 전달되지 않을 경우 기본값(defaultValue)으로"World"를 사용한다.Model: 컨트롤러에서 처리한 데이터를 뷰로 전달하는 객체다.model.addAttribute("name", name)을 통해 템플릿에 값을 넘긴다.return "greeting";: 반환값은 렌더링할 뷰의 이름이다. Spring Boot는src/main/resources/templates/greeting.html파일을 찾아 렌더링한다.
3. Thymeleaf 뷰 템플릿 작성
서버에서 전달받은 데이터를 HTML에 동적으로 바인딩하기 위해 Thymeleaf 템플릿을 작성한다.
src/main/resources/templates/greeting.html
1
2
3
4
5
6
7
8
9
10
11
<!DOCTYPE HTML>
<html xmlns:th="http://www.thymeleaf.org">
<head>
    <title>Getting Started: Serving Web Content</title>
    <meta http-equiv="Content-Type" content="text/html; charset=UTF-8" />
</head>
<body>
    <p th:text="|Hello, ${name}!|" />
</body>
</html>
xmlns:th: Thymeleaf 문법을 사용하기 위한 네임스페이스를 선언한다.th:text="|Hello, ${name}!|":Model에 담긴${name}값을 가져와 텍스트로 출력한다.|...|리터럴 대체를 사용해 문자열 합치기를 간편하게 처리한다.
4. 정적 메인 페이지(Welcome Page) 추가
Spring Boot는 src/main/resources/static 경로에 위치한 정적 파일(HTML, CSS, JS)을 자동으로 노출한다. 그중 index.html은 루트 경로(/) 접속 시 자동으로 보여주는 웰컴 페이지 역할을 한다.
src/main/resources/static/index.html
1
2
3
4
5
6
7
8
9
10
11
<!DOCTYPE HTML>
<html>
<head>
    <title>Getting Started: Serving Web Content</title>
    <meta http-equiv="Content-Type" content="text/html; charset=UTF-8" />
</head>
<body>
    <p>Get your greeting <a href="/greeting">here</a></p>
</body>
</html>
애플리케이션 실행 후 http://localhost:8080/에 접속하면 해당 정적 페이지가 출력된다.
5. Spring Boot DevTools 활용하기
개발 과정에서 코드를 수정할 때마다 서버를 재시작하고 브라우저를 새로고침하는 작업은 번거롭다. spring-boot-devtools 모듈을 사용하면 효율적인 개발 환경을 구축할 수 있다.
- 핫 스와핑(Hot Swapping): 변경된 클래스 파일만 빠른 속도로 다시 로드한다.
- 템플릿 캐싱 비활성화: HTML, CSS 등 템플릿 수정 시 서버 캐시로 인해 이전 화면이 나오는 현상을 방지하고 즉시 반영한다.
- LiveReload: 파일 수정 시 브라우저를 자동으로 새로고침한다.
- 개발 환경 최적화: 운영(Production)과 구분되는 개발용 기본 설정을 제공한다.
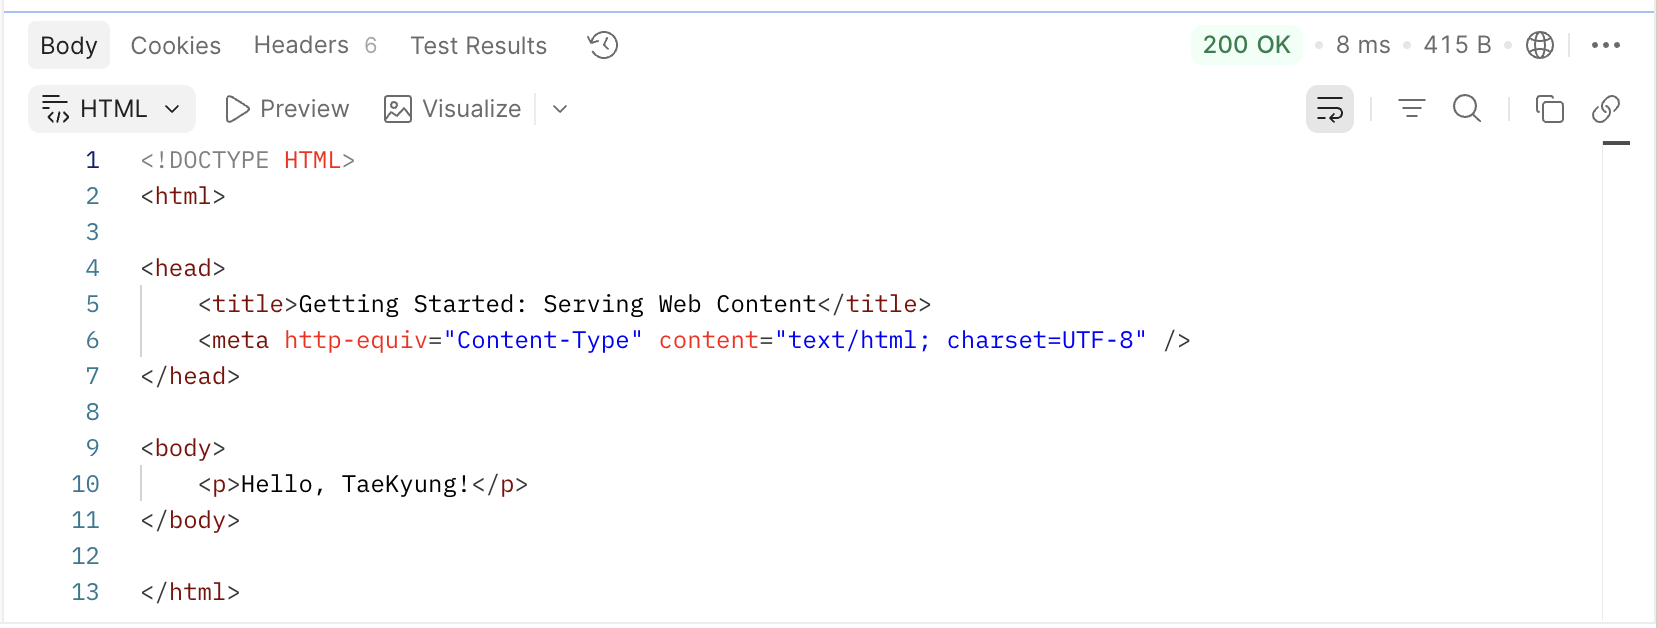
6. 동작 확인
- 애플리케이션 실행 후
http://localhost:8080/greeting접속 시Hello, World!가 출력된다. http://localhost:8080/greeting?name=TaeKyung과 같이 쿼리 파라미터를 넘기면Hello, TaeKyung!으로 동적 변경되는 것을 확인할 수 있다.